Your cart is empty.


How to Buy and Use Knife Sharpeners
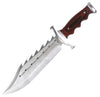
Can you slice a tomato with your favorite kitchen knife using fingertip pressure alone? Or do you find yourself bearing down on your blade, using strength where finesse should suffice? While razor-sharp knives might seem scary, dull knives can be extremely dangerous, as there is always the chance of a nasty slip when you're cutting.
What are you aiming for? The best knife has a fine, polished edge that will cut effortlessly and stay sharp with a little maintenance.
Knife Sharpening Choices
Creating a good edge and maintaining a good edge, such are the two stages of knife sharpening. To get the results you want, first decide how much time and effort you want to put in. Here's a breakdown of sharpening methods and the skills they require:
- Some electric knife sharpeners require only the skill it takes to turn the machine on and off.
- Some manual sharpening systems make greater up-front demands, but they pay off handsomely once you get the hang of them.
- The simplest knife sharpening tools, whether Arkansas wet stones, diamond dust stones, ceramic sticks, or butcher's steels, demand a little more skill, patience, and undivided attention to detail.
Electric Knive Sharpeners: Orbiting Diamond Plates
A major leap from the small, vicious grinding wheels of yore, many of today's electric knife sharpeners offer a sophisticated, engineered approach to sharpening. The Edgecraft professional sharpener and others like it use small orbiting diamond plates in two stages of grit--rough and polish--to both set and polish the edge. All you need to do is slowly pull the blade of a knife between the plates. The angle is set automatically.
Tips About Electric Knife Sharpeners
- You may love your French-style chef's knife with its heavy metal bolster between the handle and the heel of the blade, but you'll be at a disadvantage when it's time to sharpen. Because the bolster and at least 3/4 inch of blade can't be passed through the rapidly orbiting plates, some electric--and even some manually operated--sharpeners will grind a swale into the heel portion of your blade, ruining the most-used part of a chef's knife.
- If your knives have no bolsters and you can pass their entire blade through the sharpener, you will be a lot happier with the results.
- If you aren't careful, electric knife sharpeners can grind away more steel than you may have intended, limiting the life of your knife. Don't multitask while you're sharpening.
Doing It by Hand: Ceramic Knife Sharpening Solutions
Manual knife sharpening is both learnable and doable, especially if you start with a professional sharpening. Simply maintain the edge using a ceramic stick (an offshoot of space technology). A good edge can be maintained like this for up to a year.
Ceramic sticks come in two colors: blue for coarse, and white for smooth or polish. They work in the same way, but the blue stick is recommended for general use. Both come in lengths from 8 to 12 inches. Select a length you think you can comfortably control.
Benefits of ceramic knife sharpening
- Simplicity.
- Low maintenance. An occasional scrubbing with cleanser is all a ceramic stick ever needs.
- Takes up no room. Most sticks will fit right into your knife block.
Sharpen away
Holding the stick's handle securely, plant its tip on a folded towel on your countertop. This gives you a vertical line and prevents slipping. Slice the knife blade down the stick on one side and then the other, starting at the heel of the knife and sliding to the tip with your downward stroke. The two important elements are the angle of blade to stick and the pressure you apply throughout the slice. The angle has to be 10 degrees. (To find a 10-degree angle, place a standard book of matches between the blade and the stick.)
Use medium firm pressure, about 3 to 4 pounds. You are actually working the knife, cutting with it, not just stroking it lightly against the stick.
Ceramic variations
You can also find ceramic sticks preset in a block of wood (you slice straight down; the angle is set), or three sticks of different grit mounted horizontally.
Butcher's Sharpening Steels
The traditional butcher's sharpening steel predates the ceramic stick and remains a perfectly good sharpening and maintenance tool. You may find one included in the knife block when you buy a set of good knives. Make certain the steel is "regular-cut" or "standard-cut," and use it just as you would a ceramic stick. The nice thing about butcher's steels is that they don't shatter when you drop them on the floor. Ceramic sticks do.
A butcher's steel/ceramic stick caveat: You may be tempted to make blindingly fast swipes with your knife at a butcher's steel held out in front of you. While this may be impressive, it's a dandy way to slip and slice the tops off your knuckles. Plant that tip securely on a folded dishtowel on the counter and work vertically.
Sharpening Stones
Sharpening stones come in many sizes, many grits, and many materials, some natural and some futuristic. In all cases, the basic idea is the same: apply one edge of the knife to stone, moving the knife across the stone's surface as though you are cutting a thin slice off the face of the stone. It's a combination of angle and pressure. When you've finished with one side of the knife, do the other.
Stone essentials
- The longer the stone, the better.
- Mount the stone in a way that lets you use both hands on the knife. You don't want to be holding the stone with one hand and slicing the knife toward that hand.
- Know your stone material. If it's a water stone, lubricate with water. Use mineral oil on oil stones. Salad oil or olive oil will get gummy and rancid.
- Learn to maintain steady pressure and an unwavering angle of blade to stone.
- Finish with a white ceramic stick to polish the edge.